Crafts - Home Decor - Cooking - Faith - Baking - Everyday Stuff - Animals - Cleaning - Home Improvement

Thursday, January 21, 2010

Sweet Apple Bread in Jar

I love this idea. It's perfect for an unexpected guest, gift, or when you want that homebaked taste, but don't have the time. I have adapted this recipe from an article in Hobby Farm Home Magazine, one of my favorites.

Sweet Apple Bread - In a Jar
Bake @ 325 degrees for 50 minutes

2/3 cup unsalted butter
2 cups sugar
2/3 cup brown sugar, packed
2 cups apples,chopped
2/3 cups raisins
2/3 cup water
1 1/2 cups whole wheat flour
1 1/2 cups white flour, all purpose
3 teaspoons baking soda
1/2 teaspoon baking powder
1 teaspoon salt
2 teaspoons cinnamon
1 teaspoon nutmeg
1/3 cup pecans (or walnuts), chopped
1/3 cup oatmeal, quick oats

Find 8 wide mouth canning jars. (They must be wide mouth or else the bread will not come out very pretty!)
Sterilize the jars, lids and rings by boiling in water for 10 minutes. Leave the lids and rings in the hot water. Grease the inside 2/3 of the jar by using a pastry brush and oil.
Combine butter,sugar and eggs in your mixer or a large mixing bowl. Once creamed together, add the apples,raisins and water. In a different bowl, combine your flour, baking soda, baking powder, cinnamon, nutmeg. Add the nuts and oatmeal. Now, combine with your wet ingredients
Fill the jars 1/3 of the way full. Don't try to get scientific, just eye-ball it! Bake at 325 degrees for 50 minutes, or when knife inserted comes out clean.
Wipe down the rim and edges of the jar with a damp towel and put on the lids and rings tightly. The jars should seal, but you can be sure by pushing on the lid, it should not move.
Now, you have Sweet Apple Bread in a jar...How cool! :)


To give as a fun gift for a friend, add a label or cover the lid with a cute fabric scrap. Make a little tag telling them just what's inside the jar!...and maybe how sweet of a friend they are :)

Wednesday, January 20, 2010

Creamy Country 'Slaw and Bar-B-Que AKA "Hairy Hogs Back"


Apparently, we "Northwesterners" have been doing BBQ all wrong. You're supposed to put your 'slaw ON the bar-b-que sandwhich! See, down South, this ain't anything they haven't heard before. I first discovered this at a BBQ restaurant in Klamath Falls, and let me tell you, I have been dreamin' and droolin' over it ever since!

My husband, who doesn't even like coleslaw- loves this! So, for those coleslaw-haters out there, don't just dismiss this, give it a try before you disapprove.

First things first...Get the meat cooking in the slow cooker.

I used 2 lbs. of venison, but any meat will work. We want the meat to cook long and slow, so that it will want to fall apart and shred into mouthwatering pieces of meat heaven.

2 lbs. meat (roast or stew pieces, like beef, venison, pork)
4 green onions
1/2 Mayan Sweet Onion
Cover the meat in your favorite Bar-B-Que sauce ( Like the recipe I posted earlier!!)

Let it cook on low for about 6-8 hours. Check it after 6, the sugar in the bar-b-que sauce can really burn, and we don't want that to happen!

Creamy Country 'Slaw

1 head green cabbage
2 large carrots
3/4 cup mayonaise
1/4 cup sour cream
2 green onions
2 tablespoons vinegar
2 teaspoons celery seeds
1 teaspoon caraway ( if you have it)
salt and pepper to taste

Shred the cabbage and carrots and place in your serving bowl. Combine the remaining ingredients in a smaller bowl to make the dressing. Before you add it to the cabbage, taste it. Yup, get a good finger lick in and make sure it is to your liking. Nothing says you can't add more sour cream if it's too tangy, or more pepper? Experiment and get it just how you like it!

Alright, we got the meat, we got the 'slaw and now it's time to do some serious droolin'. I toasted hamburger buns in the oven, and we ate the sandwhiches open face. But, hot dog buns or Keizer Rolls work great also. Honestly, the bread is the least of your worries. You just need something to hold the meat and the 'slaw together, because that's where it's alllll at.

Tuesday, January 19, 2010

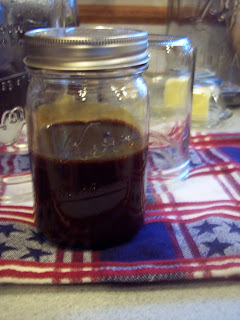
Backwoods Bar-B-Que Sauce

This is a rich Bar-B-Que sauce with a full body flavor. I made this recipe with the intention of using it in slow cooker recipes, however, it would be great with burgers, steaks, etc... The best part is it is made from common ingredients, nothing fancy shmancy!

Ingredients

1/4 cup ketchup
1/4 cup mustard
1/4 cup brown sugar
2 tablespoons dark molasses
1 teaspoon vanilla
1 tablespoon vinegar
1 tablespoon honey

Combine all ingredients in a bowl and whisk to combine. Store in an air tight container in the refrigerator.


Chocolate Ganache Ice cream Cake


One of the best combination's on the planet? Cake and ice cream! Why not put the two together in one irresistible layered ice cream cake. Underneath the utterly divine chocolate ganache coating there is a rich buttermilk chocolate cake with vanilla caramel ice cream and top with chopped pecans and caramel sauce...need I go on??
First, the ganache. What's ganache? Well, it's a fancy word meaning melted chocolate and cream blended together to create a smooth coating or filling for cakes, muffins, tarts...etc.


Chocolate Ganache


8 oz. semi-sweet chocolate chips

3/4 cup heavy cream
2 tablespoons unsalted butter (make sure to use unsalted)
2 tablespoons of corn syrup (Karo syrup)

Heat the cream and butter over medium heat in a saucepan just until boiling point is reached. Then, pour the cream and butter over the chocolate chips in a heat proof bowl. Let it sit before stirring for about 5 minutes, then go ahead and stir in the chocolate chips. Add the corn syrup and whisk until you simply cannot whisk anymore! You will want a smooth, silky consistency. Let the ganache cool at room temperature, although it can be stored in the fridge. 
* When the ganache gets stiff, simply fill a larger bowl with very hot water from your tap and place the bowl of ganache in to the bowl of hot water, but do not allow water to get into the ganache. Let it stand for about 10 minutes, and then start to whisk again. Repeat process with hot water until the desired, smooth consistency is reached again.


Chocolate Buttermilk Cake
I like this recipe because there is no egg in it, so the cake does not rise very much, which is perfect for ice cream cake. It is a sturdy cake that can hold up to ice cream being scraped on to it, and it does not add much height to the already layered, rich ice cream cake.


Preheat to 350 degrees.

1 1/2 cups flour                              
1 cup sugar                                    

1/2 cup unsweetened cocoa        
1 teaspoon baking soda                
1/2 teaspoon salt
I cup buttermilk
* or use 1 tablespoon lemon juice or vinegar and 1 cup milk

2 teaspoons vanilla
1/2 cup vegetable oil

Mix all of the above dry ingredients in a mixing bowl. Add the buttermilk ( or substitute), vanilla and oil and beat until smooth. Pour the batter into two 8-inch round cake pans. Bake for about 20-25 minutes, or until clean knife or toothpick is inserted and comes out clean as a whistle!


How to Assembly the Ice Cream Cake


Make sure your cakes are completely cooled.  TIP - place the cakes in plastic wrap and put them in the freezer for a spell to get them nice and cold, so as not to melt the ice cream!
Take your ice cream and spoon out portions until half of the carton is used, and smooth onto one of the chocolate cake layers. Then, drizzle on caramel sauce ( or another flavor) and sprinkle with chopped pecans. Now, working quickly, top theother chocolate cake with the remaining ice cream and then place on top of the other cake. Place the ice cream cake on a plate and back in the freezer to harden!
Once the ice cream on the cake is hardened, it's time to pour on the ganache. * TIP- Don't buy the cheap $1.19 ice cream, it won't freeze all the way and will only cause problems. I found this out the hard way! 
Ok, to pour the ganache, we first have to get the cake set up. Place a jelly roll pan, or a 9 x 13 casserole pan underneath the cake. This will catch the ganache that pours off the cake.  Place the cake on top of a large wide mouth mason jar or a small mixing bowl in order to raise up the cake off the pan, and so you can pick it up after the ganache is on!
Pour the ganache onto the center of the ice cream cake quickly, using all that is in the bowl. Then, with a spatula, lightly spread the ganache from the middle to the edges in order to cover all sides of the cake. If a place didn't get covered, no worries, just use your spatula to scoop up some more ganache from the pan below and pat it into place. 
Another way to spread the ganache is to carefully shake the pan underneath. This will spread the ganache from the middle to the outer edges without having to carefully use a spatula. However, be gentle when shaking, you don't want to shake your cake right off it's stand!


Once you are satisfied with your ganache, place it back into the freezer to cool down. After about 5 minutes, take it out and decorate it! Here I have coated the side with chopped pecans, and made a puddle of caramel sauce secured by some ganache and surrounded by pecans and drizzled on more caramel sauce.


The fun part about ice cream cake is there are endless variations! Try white cake and chocolate ice cream, or frost with a buttercream frosting instead of ganache. I think the next cake I will try will be a cookies and cream cake. White frosting,chocolate cake and cookies and cream ice cream with crumbled Oreos on the side and cookies on top!  Or maybe mint chocolate chip.....

Thursday, January 14, 2010

Split Pea Soup

I have a feeling Split Pea Soup has been given a bad wrap over the years.  I don't even like peas, in fact, I was convinced Split Pea Soup was from the devil. Well, that all changed when my mother-in-law sent me home with a bag of split peas. They sat in my cupboard for a couple weeks, until I couldn't stand the guilt. I had been putting it off and now it was time to make Split Pea Soup.


Apparently I wasn't the only one who grimaced at the sound of "Split Pea Soup."  It always took some convincing, and dessert, to have people over for dinner when I would make it. However, after the first bite, it was love at first sip! The secret, I think, is that I use sausage in the soup and plenty of spice, so there's no chance for bland. Seriously, if you have never tried split pea soup, or had it once and didn't care for it, try this recipe.

Slow Cooked Split Pea Soup
The Ingredients:

1 pound sausage
1 12 oz. can chicken broth
4-6 cups water
2 1/4 cups split peas
2 potatoes
1 onion
1 tsp. majoram
1 tsp. pepper
1 tsp. garlic
1 tsp. salt
1 tsp. thyme

Putting it together...

1. Wash  the split peas in a colander and remove any stones
2. Brown the sausage and drain
3. Dice the potatoes and onion
4. Combine all ingredients in slow cooker and cook on low for 8 hours. Easy as that!

Warm rolls are a great companion for this soup, or some crackers for dipping!


Monday, January 11, 2010

Super Bowl Cupcakes!

These cupcakes were a big hit at last year's super bowl party. It takes a little time to decorate them all, but with a friend's help or an open afternoon, they are the perfect treat to get the party started!

 Quick Gold Cake - Fannie Farmer

 These cupcakes turn out with the perfect big, rounded muffin tops! This is my favorite.

2 1/4  cups cake flour
3 tsp. baking powder
1 tsp. salt
1 1/4 c. sugar
1/2 cup vegetable oil
2 tsp. vanilla
1 c. milk
2 egg

.
* This recipe will also make two 8-inch round cakes.
1. Mix the flour, baking powder, salt and sugar in a bowl
2. Stir in the oil and milk and beat for 2 minutes
3. Add the eggs and vanilla and beat for another 2 minutes
4. Pour into paper cups or cake pans and bake at 350 degrees for 20 minutes or until knife ( or toothpick) inserted comes out clean as a whistle!
5. Cool in the pan for a few minutes and then turn out onto a cooling rack.

For the Frosting:

My husband's favorite Powdered SugarFrosting

2 1/2 cups powdered sugar
3 tablespoon butter
1 egg white
1 teaspoon vanilla
1/2 teaspoon salt
1 tablespoon milk
4 tablespoon flour

Cream the butter, powdered sugar, egg and vanilla. Add the salt and flour, mix. Add the milk and mix on high until thoroughly whipped.

For Chocolate:  Add 2 heaping teaspoons of cocoa to frosting

Decorating Time

Make a batch of green frosting and chocolate, and save a scoop out of each to leave plain for the writing on the cupcakes!

Frost half green, and half chocolate. For the green ones, use chocolate covered almonds for the footballs. Add lines for the laces on the ball and lines on the field for the yard lines. Easy as that! For the chocolate cupcakes, just add laces and they look like footballs! Add sprinkles if you want in your favorite team's colors!

TIP: If you don't have a frosting bag and tip, just use a sandwhich bag and cut a small opening at one of the corners! My mom taught me that one :)


Old Fashioned Cinnamon Rolls

Being new to this whole Blogging thing, I have been looking around at other peoples, and I stumbled across this one, and a new favorite : www.mommyskitchen.net

With "Old Fashioned" in the title, and the recipe all from scratch, I just had to try them! I had never made cinnamon rolls before, and I will admit I had a little trouble with the dough rising. I haven't baked with yeast much (yet), so any suggestions on why I might have goofed up, let me know!! I might have also added a little more brown sugar to the filling, and maybe some raisins and nuts?


Anyways, try the recipe! The pan didn't last long at my house...

Goodmorning Oatmeal!

I don't know about you, but I eat oatmeal every morning! I love how it fills me up, and literally sticks with me all morning. With my daily ritual, I've definitely got my favorite variations, and I thought I would share a couple with you!

Peanut Butter and Banana

Add to bowl of oatmeal: 1 banana sliced into thick chunks, 1 tablespoon of peanut butter ( or almond), about 1 tablespoon of honey, and 1/2 teaspoon of cinnamon (optional).


Oatmeal Apple Pie

Add to bowl of oatmeal: 1/2 apple chopped, 1 tablespoon of honey, 1-2 teaspoons of cinnamon, 1/2 teaspoon of nutmeg, 1 teaspoon 100% maple syrup, and top with plain granola if you wish!


Boring Venison Steaks

I was lucky enough this season to take a blacktail buck. With a freezer full of meat, the regular rolled- in -flour n' fried steaks are getting a little redundant. I came up with a couple new ideas for garlic and peppered venison steaks cooked hot in the cast iron skillet.
The Easy Part...
1. Sprinkle thawed out steaks with garlic, salt, and pepper to taste...
2. With a tablespoon of Extra Virgin Olive Oil in the pan, heat to medium high. ( I have recently discovered that the best way to cook the thinner slices of venison is in a very hot pan and turning frequently as to not burn, but the moisture will stay sealed in better!)
3. Place steaks in pan and leave on one side until the blood starts to come thru to the top and then turn. Leave for a minute and then turn again and do both sides for another 45 seconds. Check for "doneness". We like the steaks still pink in the middle!
(Turn when the blood comes to the top)

4. With a fork, remove the steaks onto a plate covered with a few paper towels and set aside.
5. With the pan greasings, add about a 1/4 cup of white flour and turn constantly to brown the flour. When browned, add milk a tablespoon at a time until you get the gravy to a thick, paste like consistency.

The Fun Part...

"Steak and Gravy Toasted Sandwhich"
    Toast 2 slices of bread, butter both slices, add mayonaise (key ingredient!). Add the steaks and top with the warm gravy from the pan.


"Mixed Green Steak Salad with Balsamic Vinaigrette Dressing"
    Get a big plate, add salad greens and warm venison steaks. To make the dressing, add:
  
         1/4 cup balsamic vinegar
         1 tablespoon chopped garlic
         1/2 teaspoon salt
         1/2 teaspoon  black pepper
         3/4 cup olive oil
Variations: Cranberries, toasted almonds, veggies...whatever looks good!


Saturday, January 9, 2010

A New Discovery for Day Old Biscuits

There could be quite possibly nothing better than warm, fresh out of the oven homemade buttermilk biscuits. Fluffy and brushed with butter on top, melt-in-your-mouth goodness! Then, the next day something happens to those heavenly biscuits right? They loose their moisture. Well, this morning while trying to think up a different variation to my husband's usual egg breakfast, I saw those two leftover biscuits on the counter. Perfect! So, I heated up my trusty cast iron skillet, scrambled some eggs with a glug of milk ( to make the eggs go farther), shredded up some ham lunch meat,crumbled up those biscuits and got to fryin'. I wasn't quite sure at first if it was going to work, but it was looking more and more like a typical breakfast casserole.  Just before the eggs were cooked thru, I added some cheddar cheese and voila! Quick and easy breakfast casserole! It looked amazing, but would the official taste tester approve? "This is seriously good.I would make the biscuits just to have them like this," he says! Woo hoo, I win the good wife award this morning for sure!

Well, needless to say I was pretty proud of my accidental discovery for left over biscuits.  Maybe you have done this before or have other great ideas? I have added them to soup, such as chicken noodle, and the biscuits soak up the broth and you've got a make-shift dumpling!

Welcome

Since, I was a kid beggin' mom to let me whip up some crazy concoction in the kitchen, I have always loved cooking and baking from scratch. I hardly ever follow recipes to the "T" and I have found this has given me a very creative outlook on coming up with wonderful homecooked meals with whatever I scrounge up in the kitchen!

Being a newlywed (going on 4 months!), with a hungry and appreciative husband, I have lots of opportunities to experiment with my so-called concoctions and learn the old-fashioned, tried-and-true methods of making from scratch. A lot of my recipes are derived off others, but some of our favorite recipes have been scratched up from random leftovers and combined with hidden treasures found in the back cupboard.

Anyways, enough about me... I hope you enjoy and become inspired by some of my favorite homecooked meals and treats! I have to add, although however corny, that what really helps my recipes is that they are all made with an extra helping of love. Lots and lots of it!

Nothing is more satisfying to me than serving up my family and friends some homemade goodness and hearing nothing but..."Oohs" and "Ahhhs."